How's everyone doing? It's the weekend so hopefully this will be a great time if you need to catch up on the lessons.
We are wrapping up the lessons with 2 more thoughtful posts about Unlocking Your Story. I've really enjoyed my first scrapbooking online class with all of you wonderful ladies!! I've loved getting your emails and seeing how you've enjoyed the process. Even though the video tutorials are done the blog will be up for a few months and I am also here to answer any questions!
Please upload pictures of your progress and link in the comments or in the message board so we can all see how great your albums are turning out!! I would love to see your unique style and your photos incorporated into the album.
Here's Lesson 10: A video with a quick look at the album as a whole, punching the holes & some dorky bloopers!! Including a message from the Director himself--Collin.
TODAY'S ASSIGNMENT & through the weekend:
Complete your album and put it all together
Upload pictures and link so we can see your beautiful album
If you think about all the stories and all the photos on your computer or tucked away in shoe boxes... you tend to feel overwhelmed. Then a lot of times when we are overwhelmed we either loose motivation, because the task seems too large. Or the same overwhelmed feeling can stifle our creativity and excitement to be creative. Push all of these thoughts aside!
Because you signed up for this class you should be proud of yourself!
Because you are going to tell stories from a chapter in your life.
Because you are documenting a handful of photos that you wouldn't have otherwise.
Even if this is one of your first mini albums or one of many- it is a great success!
Yay!
I was listening to one of my favorite songs the other day and one of the lines in the lyrics stood out to me:
Let your memories grow stronger and stronger
Until they're before your eyes
That's how I feel when I look through mini albums and scrapbook pages or even look at photos... The memories are brought to life. They "grow stronger and stronger until they're right before (my) eyes."
Oh, I love that.
Makes all the work and time worth it. Knowing someday my girls or Collin will open up their scrapbook and feel the memories brought to life!
Glad you're enjoying the class. Have fun. Keep it up!
Feel free to listen to the song I quoted above while you get creative with your mini album: Regina Spektor "The Call"
Use lace die cut paper and lay over the canvas page. Spray with Shimmerz then remove the lace paper and you're left with a pretty pattern. This is called a mask technique. Also, spray your white flower layers with Shimmerz. Let dry.
Cut a 4"x6" from cardstock. Border punch the bottom.
Crop down your photo to fit inside the cardstock to leave about a 1/4" on the edges.
Attach to the center of the canvas page with a pin in the top left corner. Add two ribbons to the pin tied in a singe knot. Add a ticket in the bottom right corner of photo and 3 of your flower layers when they are dry. Attach a rhinestone to the center of the flower.
I use foam squares to attach to my canvas page.
(Back side of Page 2: Canvas Page)
Cut a 5 1/4"x 3 1/4" piece from turquoise patterned paper. (Sparkling Season)
Attach 3"x5" photo inside cardstock. Either a horizontal 3"x5" or two photos at 2.5" x 3". Leaving about a 1/4" of cardstock on the edges.
Tie a ribbon to the pin that is showing through from the other side of the canvas page.
Adhere ruffle ribbon, ticket to the canvas page. I used foam squares. You can use fabric glue or hot glue.
"I wanted a perfect ending. Now I’ve learned, the hard way, that some poems don’t rhyme, and some stories don’t have a clear beginning, middle, and end. Life is about not knowing, having to change, taking the moment and making the best of it, without knowing what’s going to happen next. Delicious Ambiguity."
—Gilda Radner
This quote really spoke to me. It's so true that we have a vision of how we want our life story to be told.
We have the perfect characters all set to play the roles, our idea of a great plot & a happy ending. But someone above has a different plan for us.
Ways for us to grow and learn. Times for us to cherish and laugh. Times for us to experience hurt and pain.
All of which makes us stronger.
I love how the quote says to take the moment and make the best of it. Although sometimes this is more difficult then we think.
Scrapbooking helps us to focus on some of things that make us happy. Lately, I've been trying to be more real in my journaling. It was difficult for me when many people were reading what I wrote on my projects in Creating Keepsakes or online. Some may not know that I am pretty private person... but I want these pages to tell our story. I strive to continue to open up more and remember the good with the bad. Both are part of who we are and our life story. That is what this online class has helped me to see & I hope it will do the same for you.
Some more ways to approach journaling that we are going to discuss the rest of the class:
1 Free-write to dig deeper to what you want to say. ( we've done this one )
2 Lists/Numbers
3 Start with the same beginning to each sentence: she is... I remember...
4 Remember your senses when you write. Paint a picture so we feel like we're there.
We are going to skip the Canvas Page 2 for now and move to Page 3 in the album which is your Acrylic page. That way we can add the rolled flower to the metal rim tag on the envelope and finish those up.
Start of by using your beautiful blue paint to add a slight wash of color to your page.
Cut a 4"x6" piece of blue cardstock. Border punch the bottom 6". Add a 4"x3" photo to the left of the cardstock and attach to the center of acrylic page. Add a diecut brocade pattern circle punched to the bottom right of the cardstock.
Adhere a ticket to the right of the photo and cardstock.
Adhere 3 buttons with glue dots.
(Back of acrylic page)
Take out your diecut flower from magenta cardstock. We are now going to make rolled flowers. You do this by holding the outside end. Start rolling up the flower towards you and keep rolling until you get to the circle end. Now you can loosen the rolled paper to your liking and attach a glue dot to the back of the rolled flower and set on circle center.
Last, attach to the left of ticket & the metal rim tag of your envelope.
Add a photo to the right side of cardstock that is showing through from page 4.
Adhere 2 journaling sticker tickets to the left side of photo and onto cardstock. Add a rolled flower and journaling.
Watching this video... the photos clearly focus on the stage of life I am in at the moment... kids and mommy.
We are all at different stages in our lives...!!
Think about your story at the moment... and what photos you want to use. It could be anything from your pets, to your childhood, a friend. You could focus on one relationship in your life. You could write about this Fall or this week! You could just use photo about you. Your likes, loves, your routines. I can't wait to see what you choose for your album!
~Looking through my scrapbook albums there is a big difference between the pages where I took a minute to dug deeper into the memories versus just scratching the surface.
A lot of times we write what is obvious just by looking at a picture because once you've spent all this time perfecting the design, colors and photos you just want to finish it. This happens to me many times but it's so important to stop and take the time to tell our stories.
If I were in a hurry I might just write something like:
"Avery and Daddy love to play outside. It was a beautiful day and they had so much fun running around the backyard. She loves her daddy so much! They found a caterpillar and put it in a jar to watch it turn into a butterfly. Avery loves animals and even bugs!"
But what is really going on it the picture?
"I was really tired and not feeling good that day. I was in the early stages of pregnancy and the fog of morning sickness, or all day sickness, was looming over me. But it was such a nice day and Collin came home a little early so we were playing outside before dinner was ready. Collin is like a little kid sometimes and today was no exception. He found a caterpillar and was so excited! He showed Avery and she was just as thrilled. She loves ALL animals and even bugs. I mean LOVES. So they made a little home for it in a jar full of leaves, dirt and everything to keep a caterpillar happy. Collin has been wanting to do this for a while because when we was little they did the same thing and watched it change in a jar. He thought Avery would love it too. And of course she would! I love how she's reaching out her hand to hold the caterpillar that he'd just found. I love that she's so curious and fearless. I love how she will explore new things. It's difficult to think about how fast she is growing up. How she's our little curious caterpillar right now but someday she'll spread her wings and take off to explore the world on her own."
It's amazing once you start writing and digging deeper the thoughts that emerge and the stories behind the picture. After taking a bit more time I have this connection now with my Avery growing up and turning into a butterfly herself. What a difference this makes and what great meaning it adds to our projects.
TODAY'S ASSIGNMENT #1:
Write whatever comes to your mind when you look at each of your photos in a journal or on a piece of paper. The more you write the more emotions emerge. Some would call this freewriting:
Free writing — also called writing free stream-of-consciousness writing — is a prewritingtechnique in which a person writes continuously for a set period of time without regard to spelling, grammar, or topic. It helps writers overcome blocks of apathy and self-criticism. Some writers use the technique to collect initial thoughts and ideas on a topic, often as a preliminary to formal writing.
Unlike brainstorming where ideas are simply listed, in freewriting one writes sentences to form a paragraph about whatever comes to mind.
I challenge you to freewrite in a journal or a piece of paper about each set of your photos. Then we can pull ideas from it tomorrow.
1. Take out your blue/green (Gracious Hare) floral paper & cut and adhere both sides to the chipboard tab page (front cover.) With the solid color on the back of the paper showing. I used modge podge (liquid adhesive) & a cutting knife. Feel free to do your favorite way to cover chipboard.
Paint modge podge or your favorite liquid adhesive onto chipboard.
Attach 6x9 piece of paper to chipboard. Let dry.
Take exacto knife and cut off edges.
Sand edges with sandpaper
Paint edges with white paint to cover the chipboard
2. Cover both sides of the bracket shape chipboard page (back cover) with the blue polka dot paper same as step 1.
3. Take a 1"x12" piece of brocade/floral patten paper and fold to make ruffles. Add foam squares and attach to bottom or cover page.
4. Cut a 6"x 3.5" piece of green and white pattern paper (Charming Collin) with foam squares at the top and tape runner adhesive at bottom. Overlapping the brocade pattern a 1/4".
5. Paint your manilla tag with a white wash of white paint and set aside to dry.
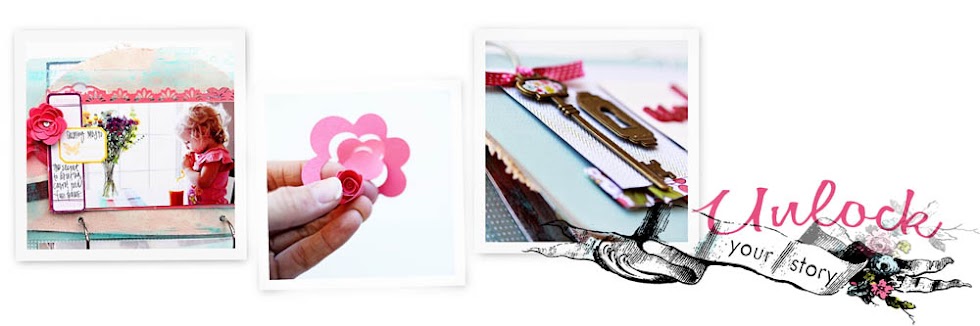
6. Add the words "unlockyourstory" to the painted tag. Add brown ribbon stapled or tied to the end of tag. Attach the tag hanging off the right edge of the green/white chevron stripe paper about 1/2".
7. Tie a ribbon to key or use a glue dot to attach ribbon. Adhere key and key hole to the left side of the green/white chevron stripe paper with foam squares or glue dots.
KEEP IN MIND: Basic facts & questions about our class.
-The class is self-paced so you can take your time and do the lessons when it is convenient for you.
-All the lessons will be posted to this private class blog. I will send you each an email to let you know the lesson is posted.
-The blog will be up for as long as you need to finish your album. Up to several months.
-The lessons will be posted by 10:00 am mountain standard time on Weekdays. Monday-Friday. You can use the weekends to catch up on what you might have missed during the busy week. (I will send you an email to tell you when each new lesson is up.)
-If you are making your own album and did not buy a kit... I would suggest a front cover, back cover, 3 inner pages & 2 envelopes (A2 size.)
-The photos I used are everyday photos of us around our home & outside. This album is so versatile that you could use photos from anything. Family, friends, pets, etc.
-If you are missing anything from your kit... shoot me an email. (elizabeth.kartchner@gmail.com)


